
Podcast Microphones Compared: Samson Q2U vs Shure MV6 Gen 2 vs MV7+
Compare Samson Q2U, Shure MV6 Gen 2 and MV7+: US prices, USB vs XLR, included accessories, monitoring and the complete beginner setup.

Contents9
- Which podcast microphone should a beginner choose?
- How much do these microphones cost in the US?
- Samson Q2U: an accessible USB/XLR starting point
- Shure MV6 Gen 2: a USB-first choice
- Shure MV7+: USB processing and an XLR upgrade path
- Is USB or XLR better for a first podcast?
- How do you get cleaner sound in an ordinary room?
- What should be included in your microphone budget?
- Which microphone is worth buying for your workflow?
The best beginner podcast microphone is the one that fits your connection, recording space, and complete setup budget. A USB microphone is usually the simplest way to record one voice on a computer. A USB/XLR model adds an upgrade path if you later buy an audio interface, but that extra socket does not automatically improve an untreated room.
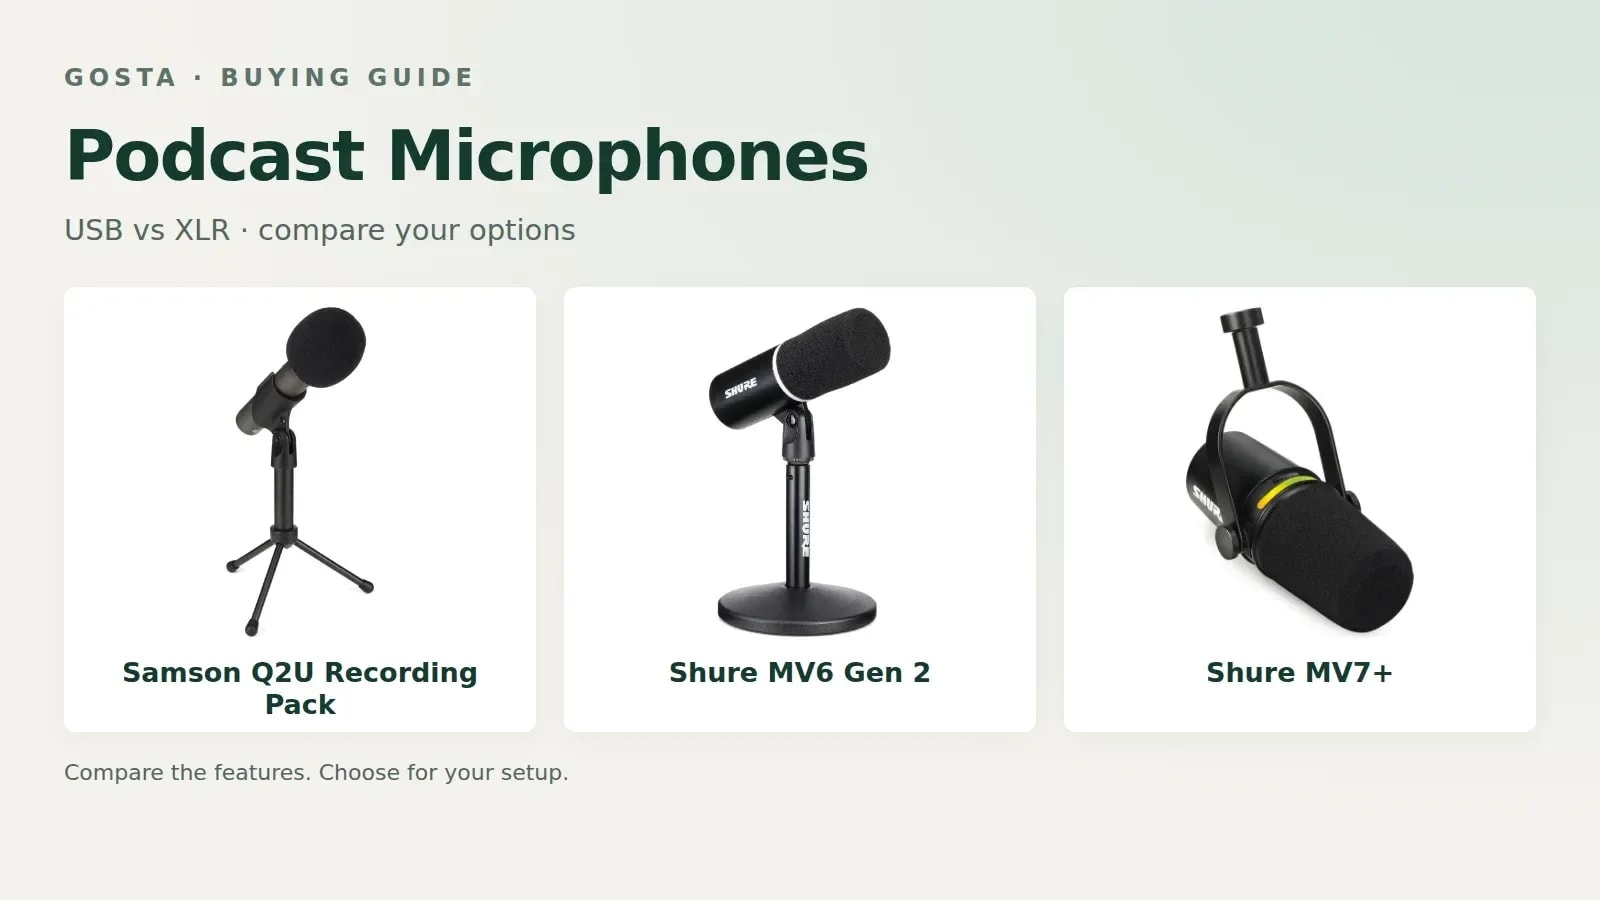
This guide compares the Samson Q2U Recording Pack, Shure MV6 Gen 2, and Shure MV7+. The selection covers an accessible USB/XLR package, a USB-only model with processing, and a more expensive hybrid option. Recommendations are based on documented features and listed prices, rather than a claim that we performed a studio shootout or measured their noise rejection.
Which podcast microphone should a beginner choose?
A beginner should choose the Samson Q2U for a lower-cost USB/XLR starting point, the Shure MV6 Gen 2 for a USB-first workflow, or the Shure MV7+ when both processing over USB and a future XLR connection matter.
Start with the Q2U if you want a desktop stand and accessories in the listed package without paying for more advanced software features.
Consider the MV6 Gen 2 if you record directly to a computer and prefer a microphone designed around a simple digital workflow.
Consider the MV7+ if you want USB-C and XLR, and can justify the cost of the microphone plus a suitable mounting solution.
All three are dynamic microphones. That does not make any of them immune to a loud keyboard, traffic, or echoes. Placement, recording distance, gain, and the room still affect the result. Choose the right connection first, then budget for the position in which the microphone will actually be used.
How much do these microphones cost in the US?
The checked Sweetwater listings show $99.99 for the Samson Q2U Recording Pack, $169.00 for the Shure MV6 Gen 2, and $255.00 for the black Shure MV7+.
Prices and listed availability were checked on November 22, 2026. These are the specified new-product listings, not open-box offers or financing payments. Sales tax and delivery depend on the order. Promotions can end, and adding a stand, headphones, or an interface changes the total cost.
Model | Price / reference | Offer details | Key features |
|---|---|---|---|
Samson Q2U Recording Pack | $99.99 | Sweetwater; listed in stock; tax and delivery extra where applicable | Dynamic; USB + XLR; headphones; desktop stand and accessories |
Shure MV6 Gen 2 | $169.00 | Sweetwater; listed in stock; Gen 2, not original MV6 | Dynamic; USB-C; software processing; no XLR output |
Shure MV7+ | $255.00 | Sweetwater; listed in stock; discounted microphone-only listing | Dynamic; USB-C + XLR; MOTIV Mix processing over USB |
The MV6 entry is specifically Gen 2. Do not assume a discount on the original MV6 includes the same features or cable package. Likewise, the MV7+ is different from the original MV7 and the MV7i. Read the complete model name before comparing prices.
Samson Q2U: an accessible USB/XLR starting point
The Samson Q2U Recording Pack is the most accessible-priced option in this comparison for someone who wants to begin over USB and retain an XLR connection for later.

The checked package includes the dynamic microphone, a desktop stand, cables, and a foam windscreen. Its headphone output lets you monitor your voice at the microphone. That package can make the first purchase simpler than buying a microphone body and discovering that you still need several accessories before recording.
The practical tradeoff is the desktop position. A small stand may put the microphone too far below your mouth or pick up bumps through the desk. Before paying for an upgrade, test whether raising or repositioning the microphone solves the problem. A compatible boom arm can be a useful later purchase, but it is not a requirement for every beginner.
Choose it if you want a flexible entry point and plan to learn microphone technique. Look at the total package, not only the microphone's price, when comparing it with a bare microphone listing.
Shure MV6 Gen 2: a USB-first choice
The Shure MV6 Gen 2 is a useful candidate when you want a dynamic USB microphone with software-assisted controls and do not need an XLR output.

The Gen 2 feature set includes Auto Level, an adjustable real-time denoiser, Digital Popper Stopper, and a five-band equalizer. These tools can make a direct-to-computer workflow more convenient. They do not remove the need to record at a sensible distance or prevent a badly overloaded recording from sounding distorted.
USB-only operation is an important purchasing distinction. You cannot later connect an XLR cable to this model and turn it into an analog microphone. If your planned upgrade is a two-microphone audio interface, consider whether a hybrid model is a better fit before buying.
Choose it if you want to concentrate on a one-person computer setup. Check your operating system, available USB connection, mounting position, and included accessories rather than assuming every generation uses the same bundle.
Shure MV7+: USB processing and an XLR upgrade path
The Shure MV7+ suits a beginner who wants a more flexible hybrid microphone and expects to use both its USB features and an XLR connection over time.

It combines USB-C and XLR outputs with app-based control and digital processing. Its MOTIV Mix features operate through the digital USB connection; do not expect the same computer-controlled processing to be added automatically to the analog XLR signal.
The microphone-only price is not the cost of a finished podcast desk. Confirm whether your selected listing includes a stand or arm, and whether the mount fits your desk. If you plan to use XLR, add an appropriate cable and interface to the budget. Paying more for a hybrid connection makes sense when you have a specific use for it.
Choose it if the hybrid workflow and digital controls justify the extra spending. If you will record one voice over USB indefinitely, compare its useful features with the less expensive alternatives before deciding.
Is USB or XLR better for a first podcast?
USB is usually easier for a first solo podcast, while XLR is more useful when you want a dedicated interface, several local microphones, or a larger recording setup.
A USB microphone includes the conversion needed to send digital audio to a computer. An XLR microphone sends an analog signal to separate equipment, so the interface becomes part of the purchase and setup. Neither connector is a guarantee of a better voice recording on its own.
Your setup | Connection to consider | Extra equipment to check |
|---|---|---|
One person at a computer | USB | Compatible cable, mount, headphones |
Two people in the same room | XLR with a suitable multi-input interface | One microphone per speaker, cables, stands |
Solo now, larger setup later | USB/XLR hybrid | Future interface budget and software workflow |
Do not assume two unrelated USB microphones will behave like a ready-made two-channel podcast interface. Software and operating-system arrangements vary. For local conversations, plan the whole recording chain before purchasing several microphones separately.
How do you get cleaner sound in an ordinary room?
Cleaner podcast sound starts with positioning the microphone close enough for a clear voice, controlling the recording level, and reducing unnecessary room noise.
Place the microphone so you can speak naturally without leaning forward throughout the recording. Keep it out of the direct path of strong breath blasts, use suitable wind protection, and monitor with headphones. A short test recording will reveal problems that a product specification cannot predict.
Move a noisy computer farther away where practical, avoid an unnecessarily reflective corner, and test with the room in its normal condition. A denoiser can help with some background sounds, but strong processing can also change the character of your voice. Listen to the result rather than simply selecting the strongest setting.
What should be included in your microphone budget?
Your microphone budget should include the stand or arm, headphones, cables, and any required interface, not just the microphone body.
Mounting: check thread compatibility, microphone weight, desk thickness, and the arm's reach.
Monitoring: a headphone socket is useful only if you have suitable headphones and understand the monitoring controls.
Cables: confirm that the supplied USB cable fits the computer, and budget for XLR separately where needed.
Software: check recording and remote-call requirements before assuming a free companion app replaces every production tool.
Returns: keep packaging until you have tested the microphone in your own recording position.
The most sensible first purchase is a complete setup that you can use comfortably. A correctly positioned Q2U can be more useful than an expensive microphone left too far away because there was no budget for a mount.
Which microphone is worth buying for your workflow?
The microphone worth buying is the one that solves your present recording needs while leaving only the upgrade options you are likely to use.
Pick the Q2U package for a lower-cost hybrid start, the MV6 Gen 2 for a focused USB workflow, or the MV7+ for a more flexible USB/XLR setup. Before ordering, check the precise model, package contents, current price, and return terms. Then make a test recording in your own room before buying extra accessories to solve problems you have not yet identified.
Best of the week — in your inbox
No spam. Only top Gosta stories. Unsubscribe in one click.
Comments